admin site features and working showcase video>
Welcome to KamiKoto, a beautifully crafted, high-fidelity e-commerce platform offering a seamless shopping experience for premium items. This codebase is built with React.js and Firebase, optimized for fluid UI/UX, premium aesthetics, and responsive performance.
KamiKoto operates on a decoupled, serverless e-commerce architecture split across two repositories:
- Storefront (This Repository): A customer-facing single-page application built using React.js and styled with custom vanilla CSS for high-performance and rich visual design. Hosted on Cloudflare Pages.
- Admin Dashboard (shopAdmin - Located in
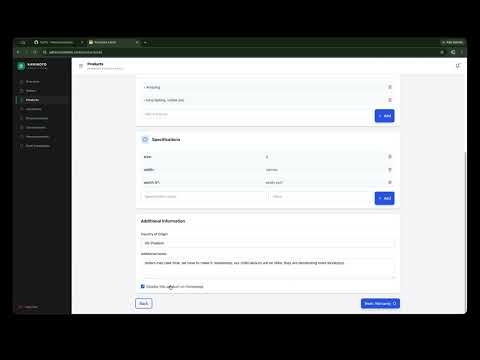
/shopAdmindirectory or hosted in a separate repository): A complete administrative dashboard for managing products, tracking inventory, processing order statuses, and viewing platform analytics.
- Database & Auth: Google Firebase (Firestore and Firebase Authentication) handles user accounts, orders, and products.
- Payments: Razorpay handles secure card/UPI/Wallet payments through a Cloudflare Pages serverless function that creates orders and verifies signatures.
- Emails: Resend API powers high-fidelity transactional notifications (order confirmation, packed, shipped, and delivered updates) routed via Cloudflare serverless proxy endpoints.
-
Clone the Repository:
git clone https://github.com/itfeelsharsh/shop.git cd shop -
Install Dependencies:
npm install
-
Setup Local Environment Variables: Copy the example environment file and fill in your values:
cp .env.example .env.local
Note: .env and .env.local files are explicitly ignored in version control to prevent security leaks.
-
Run the Storefront Locally:
npm run dev
-
Navigate to the admin folder:
cd shopAdmin -
Install dependencies:
npm install
-
Setup Local Environment Variables:
cp .env.example .env.local
-
Run the Admin Dashboard Locally:
npm start
To ensure complete privacy and security of your API keys and client credentials, do not commit any secret tokens or private keys to the repository.
- REACT_APP_FIREBASE_API_KEY: Firebase Web API key
- REACT_APP_FIREBASE_AUTH_DOMAIN: Firebase Auth Domain
- REACT_APP_FIREBASE_PROJECT_ID: Firebase Project ID
- REACT_APP_FIREBASE_STORAGE_BUCKET: Firebase Storage Bucket
- REACT_APP_FIREBASE_MESSAGING_SENDER_ID: Firebase Messaging Sender ID
- REACT_APP_FIREBASE_APP_ID: Firebase Web App ID
- REACT_APP_RECAPTCHA_SITE_KEY: Google reCAPTCHA v3 site key
Configure the following in your Cloudflare Pages dashboard under Settings > Environment Variables:
- FIREBASE_API_KEY: Firebase key used in webhook verification
- FIREBASE_PROJECT_ID: Firebase Project ID
- RAZORPAY_KEY_ID: Razorpay key ID used by the create-order serverless endpoint
- RAZORPAY_KEY_SECRET: Razorpay secret used to verify payment signatures
- REACT_APP_RAZORPAY_KEY_ID: Public Razorpay key exposed to the storefront
- RESEND_API_KEY: Resend private API key (re_...)
Razorpay processes secure card, UPI, and wallet payments via a hosted checkout popup.
- Create a Razorpay account at https://razorpay.com.
- Generate a Key ID and Key Secret from the Razorpay dashboard and configure them as
RAZORPAY_KEY_IDandRAZORPAY_KEY_SECRETin your Cloudflare environment variables. - Add the public key as
REACT_APP_RAZORPAY_KEY_IDfor the storefront. - The app uses the serverless endpoints under
/functions/api/razorpay/to create orders and verify signatures after checkout completes.
Emails are automatically sent upon checkout success (Payment Successful) and on order status updates from the admin panel (Packed, Shipped, Delivered).
- Sign up at https://resend.com.
- Create an API key and add it as
RESEND_API_KEYin your environment variables. - Add your verified domain (e.g. your-domain.com) in Resend. Transactional emails default to hello@mailer.yourdomain.com.
- Disabling Emailing: If you do not wish to use transactional emails or don't have a Resend account, simply leave the
RESEND_API_KEYunconfigured or setREACT_APP_EMAIL_ENABLED=falsein your.envconfiguration. The application will gracefully bypass email delivery without breaking checkout or status workflows.
- Cloudflare Pages: We recommend hosting both repositories on Cloudflare Pages. Cloudflare Pages offers free hosting, automatic builds from GitHub, and serverless Functions support (located in
/functionsdirectory). - Custom Domains: You can use your default Cloudflare
pages.devsubdomain, or bind a free custom domain. Custom domains can be acquired for free via Digiplat or similar registrars, and added directly to your Cloudflare Pages dashboard.
App Check protects your Firestore database and Authentication services from unauthorized bots and abuse.
- Register reCAPTCHA v3: Go to the Google reCAPTCHA Admin Console and create a reCAPTCHA v3 site key for your domains (e.g.,
kamikoto.click). - Configure Site Key: Copy the Site Key and add it as
REACT_APP_RECAPTCHA_SITE_KEYin your.env.localor environment configuration. - Configure Secret Key: Copy the Secret Key from the reCAPTCHA console, go to Firebase Console > App Check > Apps, select your Web App, click reCAPTCHA v3, paste the Secret Key, and save.
- Enforcement: In the APIs tab under App Check, click Enforce for Cloud Firestore and Identity Platform (Authentication).
- Local Development: When running locally, App Check will print a debug token in your browser's Developer Tools Console. Copy that token and add it under the Web App's Manage debug tokens settings in the Firebase Console to bypass verification while developing.
- Go to Firebase Console (https://console.firebase.google.com) and enable Firestore and Authentication.
- Apply the rules present in
firestore.rules.txtto your database. - To promote a user account to Admin:
- Register the user via the storefront signup flow.
- Go to your Firestore Console, locate the user's document in the
userscollection, and add a string field:userRole : Admin - This user now has full permissions to manage products, view customers, and update order statuses in the shopAdmin interface.